
Help to transform our extraordinary hospital into something even better.
- Refine search:


Thank you for taking part in our pilot as we explore new ways to bring the care we deliver to our patients. If you have any questions please contact your community nurse specialist team.
Please look after the TytoCare device and its accessories. We kindly ask that you don’t use them for any purpose other than which they are intended. By looking after this equipment this means we can continue to provide the care your child needs.
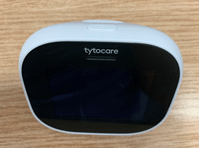
In your TytoCare pouch you will have the TytoCare device and accessories as below.

In order to connect any of the accessories to the TytoCare device, align the blue dot on the accessory and then gently push the two together.
Example with stethoscope as below:

Ensure that you look after the device, make sure it is charged between uses and keep out of reach of children. A USB cable and UK plug is also provided. The charging point is circled in the image below.

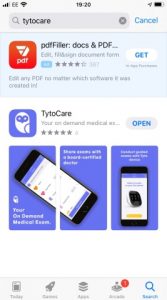
The hospital will add your details onto the TytoCare platform and you will be sent a ‘Welcome email’ from TytoCare with your user log-in and password details. You will need to follow these instructions and log in.
 Apple |  |
|
| 2. Select the TytoCare App. | ||
 | 3. Login by entering the Username and Password you have been provided in the ‘Welcome email’ from TytoCare. Note: This is case sensitive so please make sure you use any capital letters where appropriate. | |
 | 4. Turn on the TytoCare device by pressing the button on the top. | |
 | 5. The screen displayed on the device will prompt you to download the TytoCare App if you haven’t already. Tap ‘I have the app’. | |
You must perform a short pairing process between your mobile and the device over Wi-Fi or Hotspot. This process is done once per device (if your Wi-Fi network is not secured by a password, you will not be able to pair the device and app).
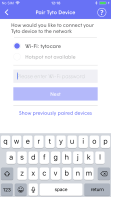
| 1. The pairing procedure should start automatically upon login or after the registration process. If you do not see the ‘Pair Tyto Device’ screen (below) please refer to the manual pairing procedure on page 10. Enter Wi-Fi password and tap ‘Next’. |
| 2. QR code created on the mobile device. Enter Wi-Fi password and tap ‘Next’. |
|
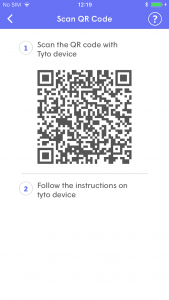
| 3. You now need to use the Tyto device camera to read the QR code from the mobile device screen. Follow the four steps labelled below: |

| a) Tap ‘Scan barcode’ on the device. The device camera is activated. |

| b) Position the crosshairs over the QR code displayed in the App. When identified, wait until the pairing process is finished. |

| c) Success confirmation in App – tap ‘ok’. |
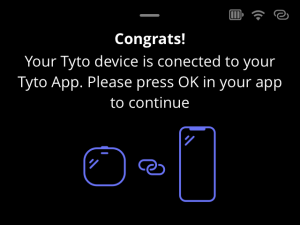
| d) Confirmation in the Tyto device. |
 | 1. Open the mobile device ‘Personal Hotspot’ settings and enable the Hotspot. |
| 2. Tap ‘Scan barcode’ on device. The device camera is activated. |
| 3. Position the crosshairs over the QR code displayed in the App, for iOS devices only: after scanning go back to the settings screen of the hotspot network on your phone and wait for it to connect to the network, see image in step 1 above. When identified, wait until the pairing process is finished. |
| 4. Wait for the device confirmation and switch back to the Tyto App. |
Follow this procedure for manual pairing should the automatic pairing process be unsuccessful.

| 1. Tap Menu, located at the top-left corner of the App. |

| 2. Tap ‘Pair Tyto device’ |

| 3. Follow the App instructions. |
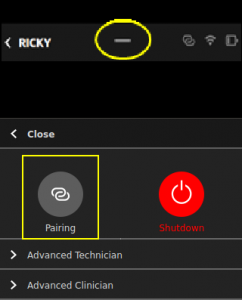 | 4. Swipe down on the short line on the top of the device. Tap ‘pairing’. |
|
| 5. Tap ‘connect to phone’, and then ‘scan barcode’. |
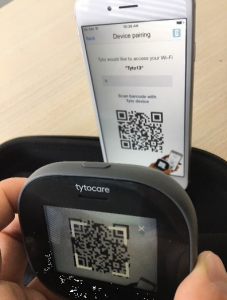
| 6. Use the device camera to scan the QR code: Position the crosshairs over the QR code displayed in the App. |
 | 7. Success message will pop-up. Tap OK to continue. |
The connectivity status of the device to the TytoCare App is indicated in the upper right corner of the device screen as well as on the TytoApp.
| Device connected to the App | ||
| Device not connected to the App | ||
| Device is paired | ||
| Device is disconnected | ||
Your clinical teams will advise which option to use.
 | 1. On the phone now select your child’s name from the ‘Patient list’. |
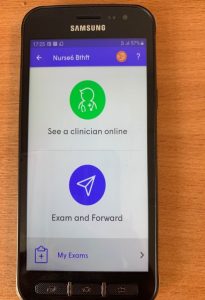 | 2. You will then be presented with two options, ‘See a clinician online’ or ‘Exam and Forward’. If ‘See a clinician online’ please note you will see a waiting area until the nurse or doctor starts the video call. Select ‘Exam and Forward’ to record an examination and send it to a team to review. |
Help to transform our extraordinary hospital into something even better.
By continuing to use the site, you agree to the use of cookies. more information
The cookie settings on this website are set to "allow cookies" to give you the best browsing experience possible. If you continue to use this website without changing your cookie settings or you click "Accept" below then you are consenting to this.